

Booking Manager gives you the ability to send Quick Price Quotes to your clients from the main screen.
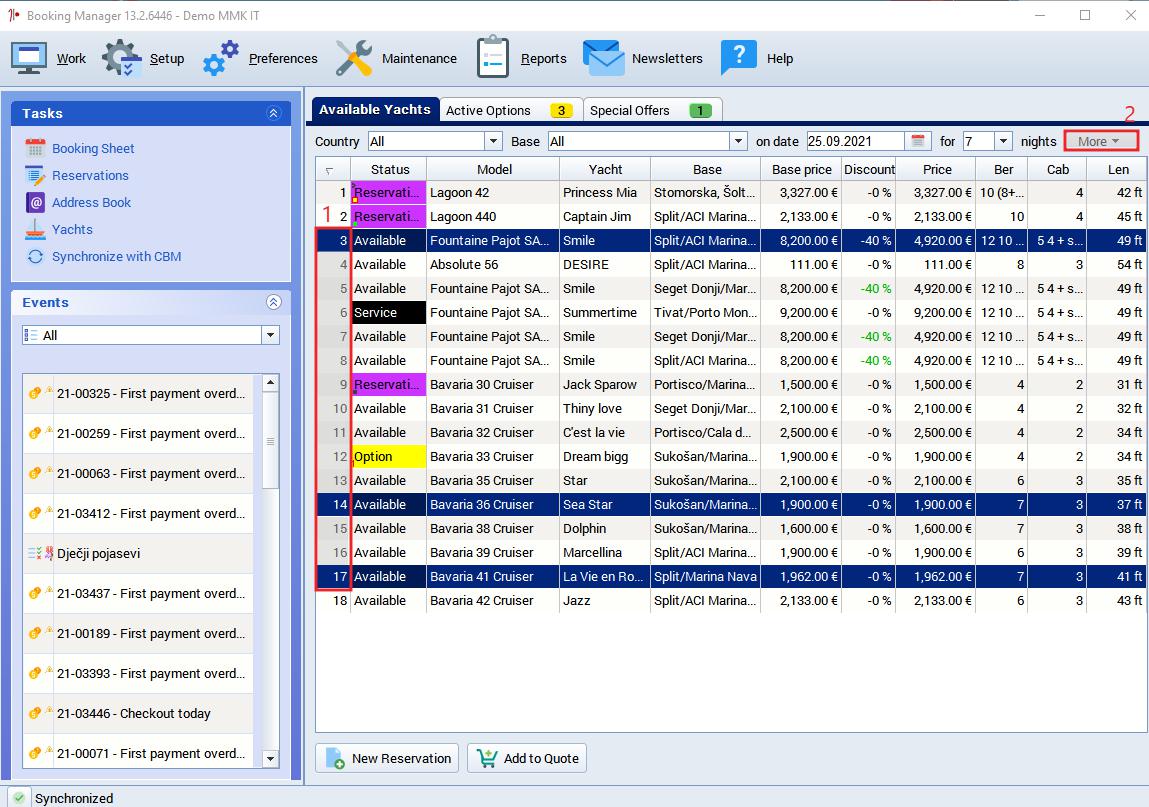
1. Selecting the boats
Boats are easily selected by selecting them on the main screen. If you want to select multiple boats hold the CTRL key and click on any boat that you want to include in your quote (1.).
If you want to change the currency or filter the boats according to other parameters, click on More (2.) button.
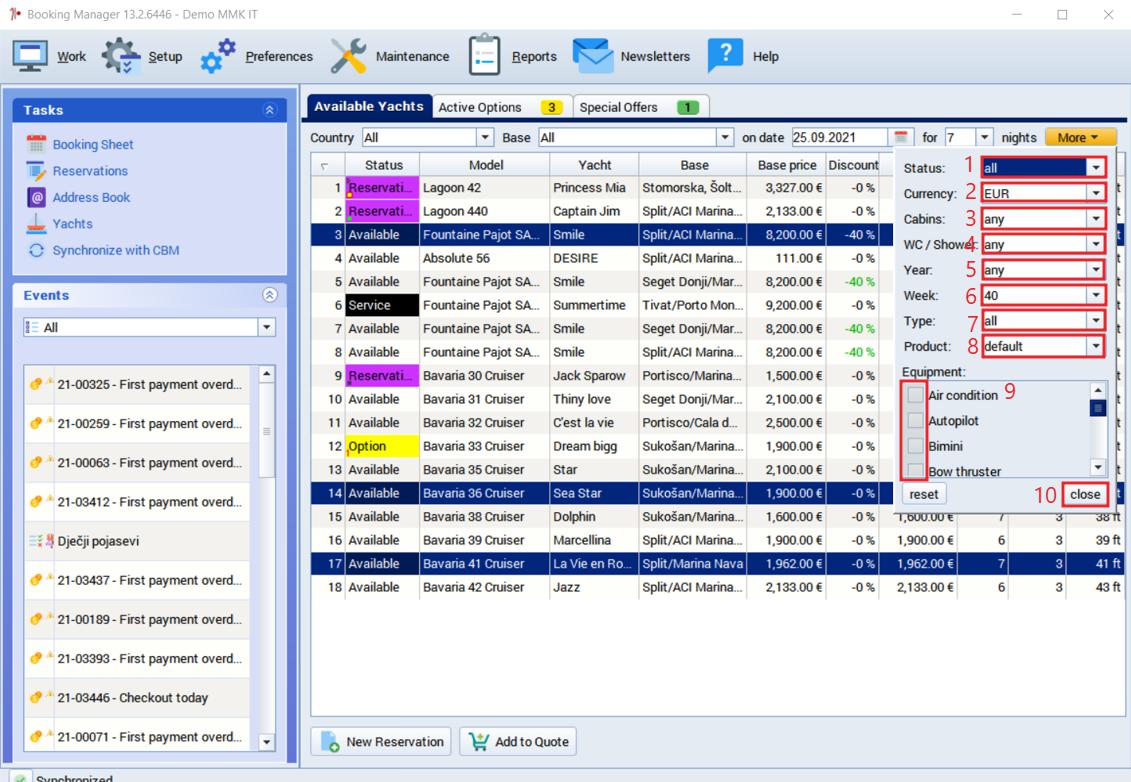
Once the filter opens
- you can filter the Status of the boats between available or boats under option.
- You can select the currency in which you want to send the quote (default currency is Euro). The prices will automatically recalculate according to the exchange rate. For more details on exchange rates please refer to chapter 1. of How to send offers/invoices with alternative currency article.
- Next, you can filter boats on the main screen according to the number of cabins
- You can use a filter according to how many WC/showers boat have
- You can select a boat by the year of build
- You can filter a certain week in the year
- You can use a filter according to a certain type of boats, either Sailing boats, Motorboats, Catamarans etc.
- You can use a filter according to a product like bareboat, crewed, cabin etc.
- Select a filter of the boats according to the particular equipment items they have
- After you have selected the filters press close
The filtering will most likely cancel your previous selection so you will have to add boats from filtered results again before you can proceed to add to the quote.
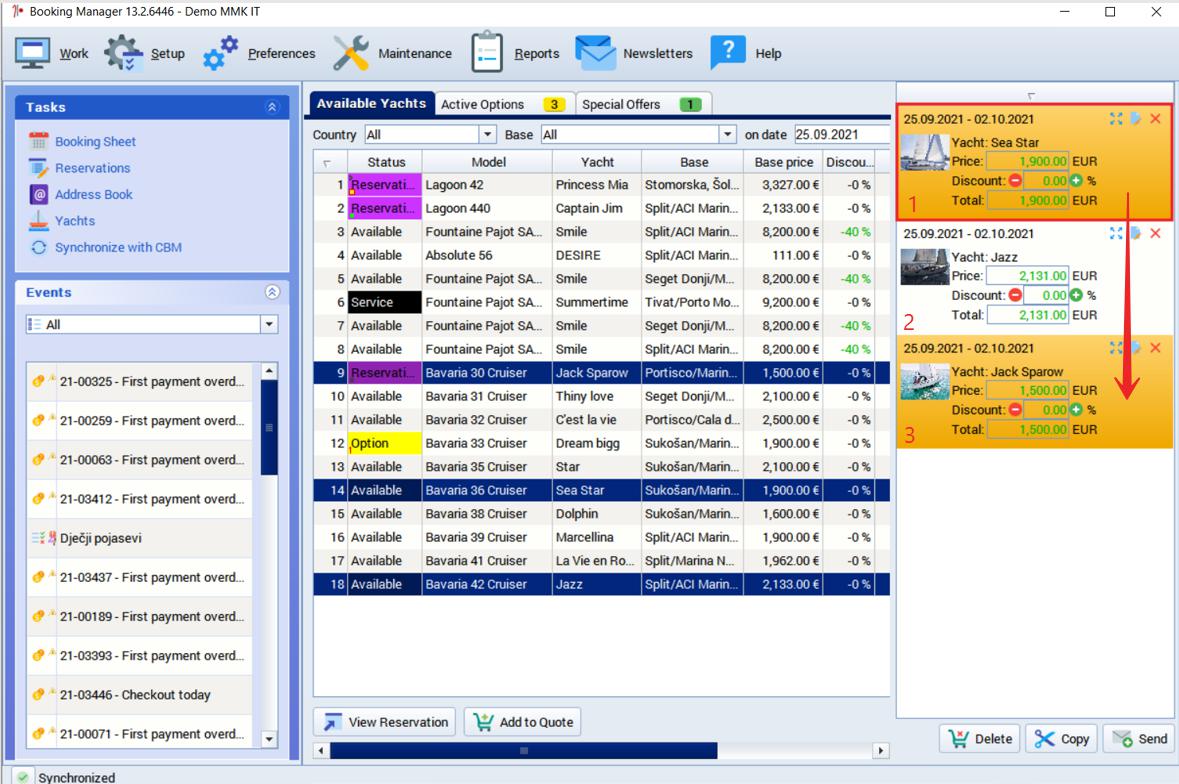
2. Adding to quote
After you've selected filters you can create a Price Quote in two different ways
- Click on Add to quote
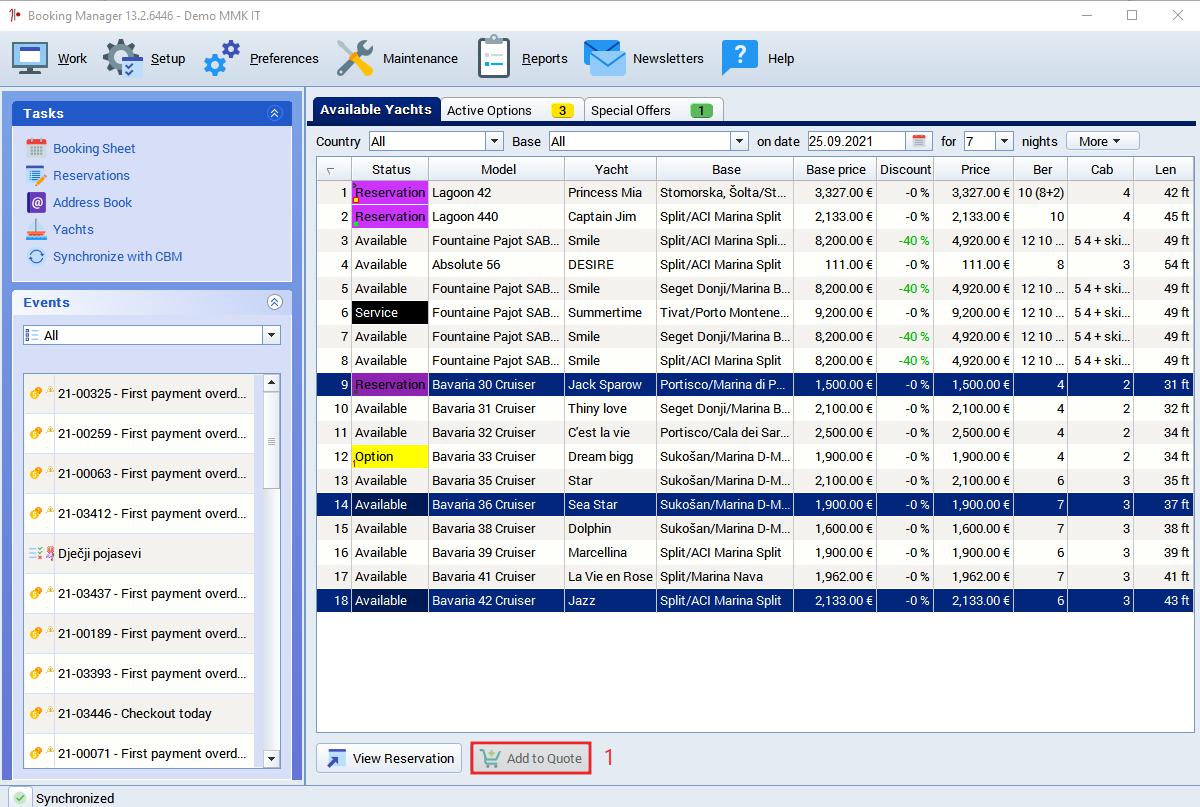
Another way is to
- Click on the selected boats, hold the left mouse button
- Drag it to the right the Quote column will open and release the mouse button to drop the selection into the quote.
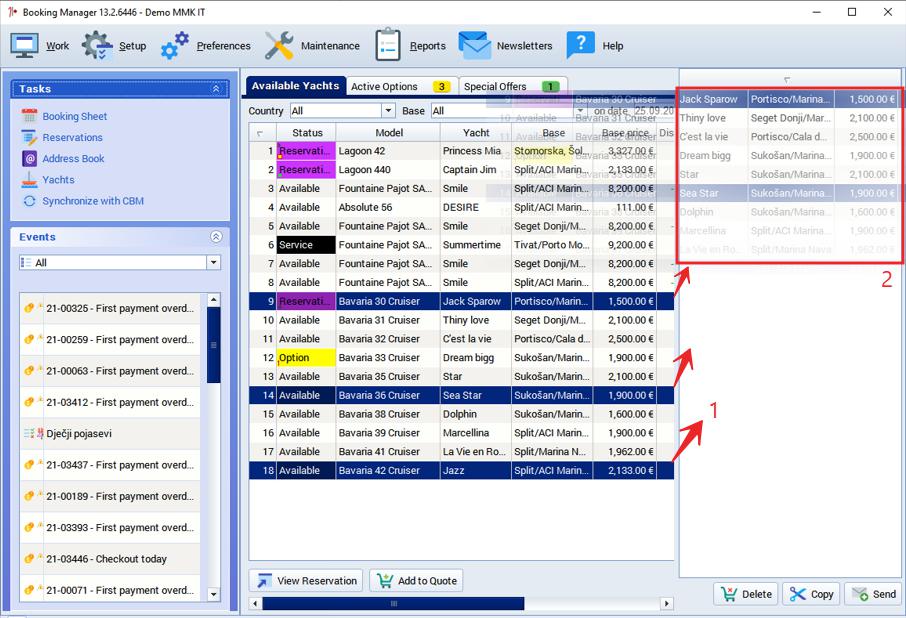
The list of selected boats will appear in the preview on the right.
You can change the order of the boats in the quote
- Click on one boat
- Hold the left mouse key and drag it below (or above) the other boat(s)and then
- Release the mouse button to drop the boat in the desired place.
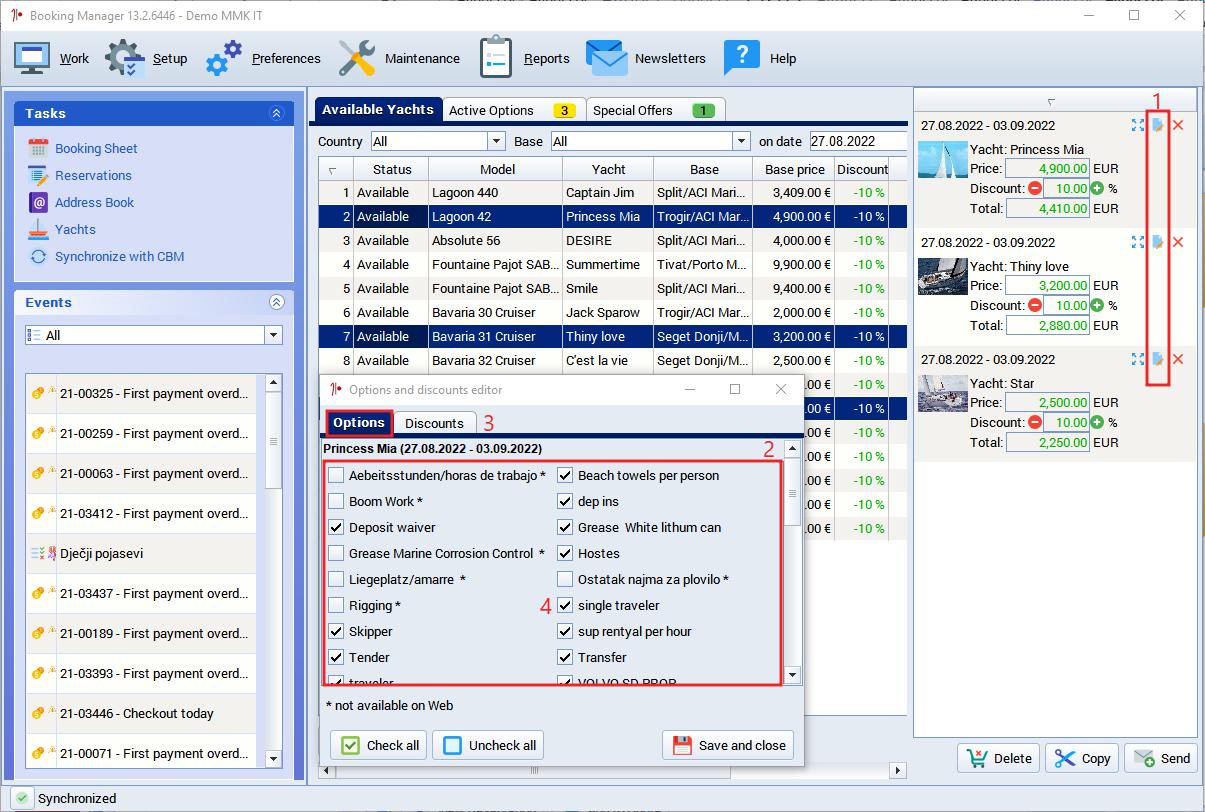
How to add Optional Extras to the Price Quote?
Each boat in the offer can be assigned optional extras to be sent.
- Click on the little notepad sign
- Options and discounts editor will open
- Select the Options tab
- Choose which options you what to send in the quote
You can select extras for each boat separately.
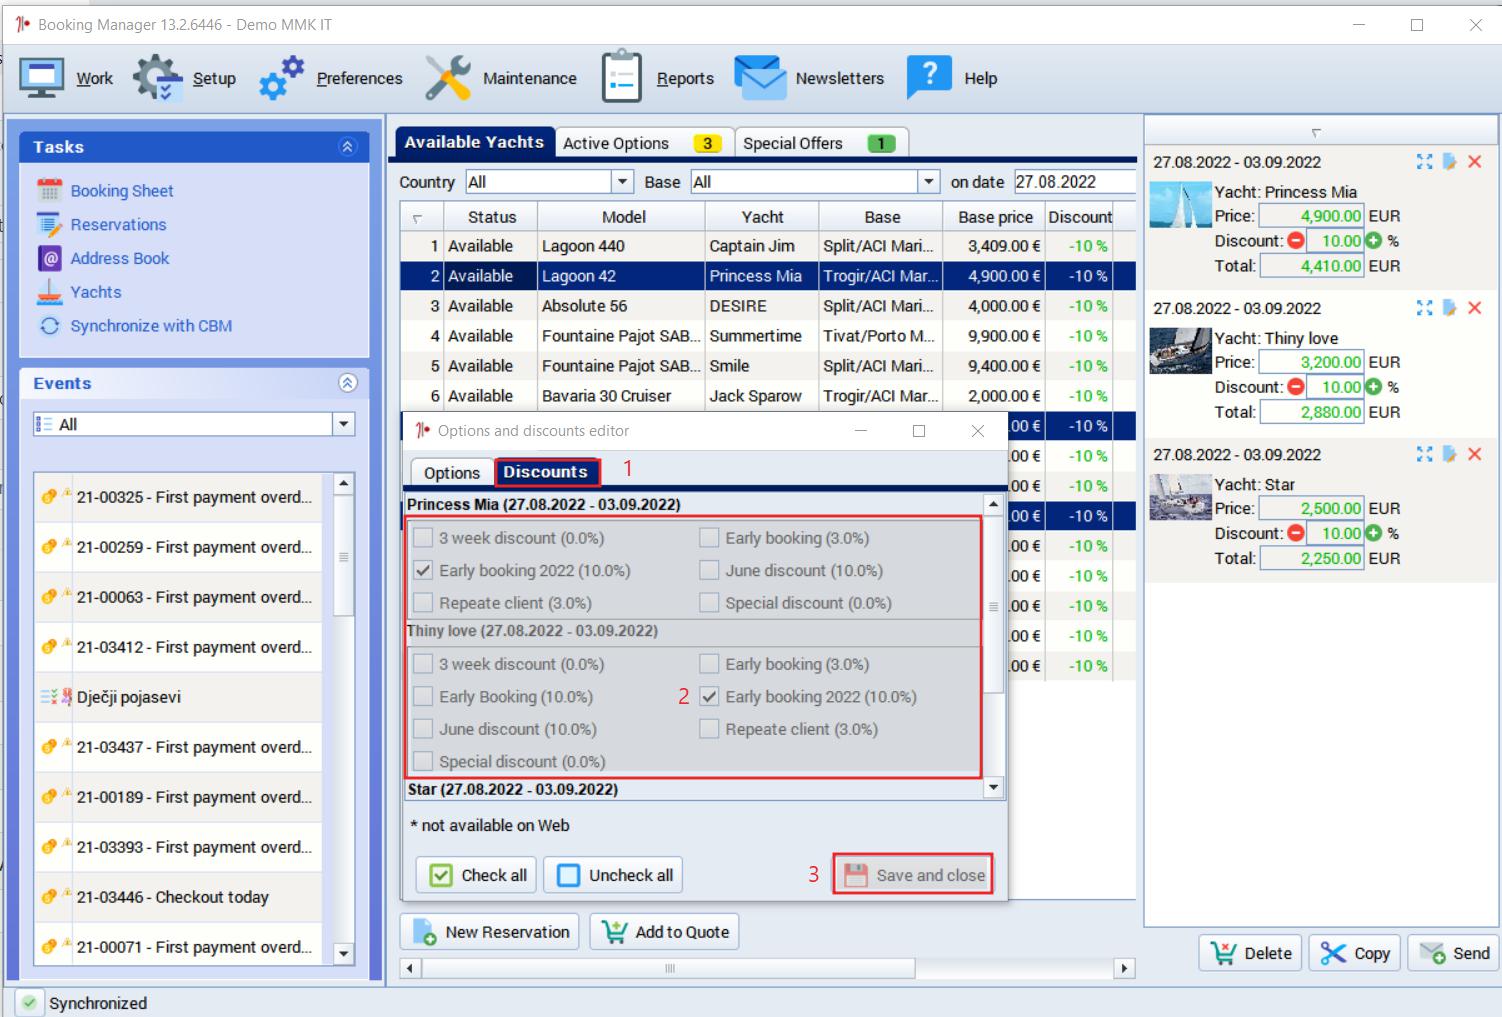
How to add Discounts to the Price Quote?
To add discounts to the Price Quote
- Select Discounts tab
- You can add any discount from your Discount types editor to your quote and for each boat separately
- Once you made your Options and Discounts selection click on Save and close
- When you are done, press Send
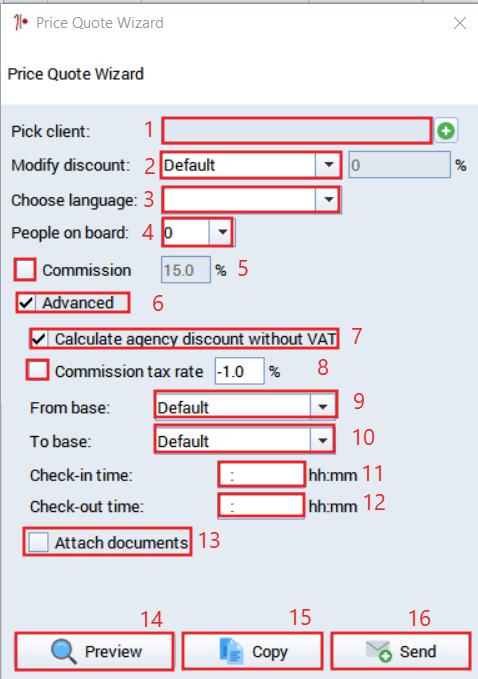
3. Price Quote Wizard
After you pressed Send a Price Quote Wizard will appear in which you can select:
- Agents/Clients, single or multiple, from your address book, When the address book opens you are able to use its powerful filters to select the clients that you wish to target. For example, this is how to quickly find all clients that still haven't make a booking in the current season
- You can modify the discount by the amount or give a fixed discount higher in percentage than the regular discount shown in the main window
- Select the language in which the offer will be sent
- You can choose how many people will be on board, according to inserted number calculation will be automatically adjusted
- Choose which amount of commission you are giving to an agent
- If you click on tab advanced you can select more options for Price Quote
- Choose if you want to calculate Agency commission with or without VAT
- Choose which tax rate will apply
- You can change baser From
- You can select base To
- Choose check-in time
- Choose check-out time
- If you select Attach document you can send any document with a Price Quote such as Base info
4. Sending the quote
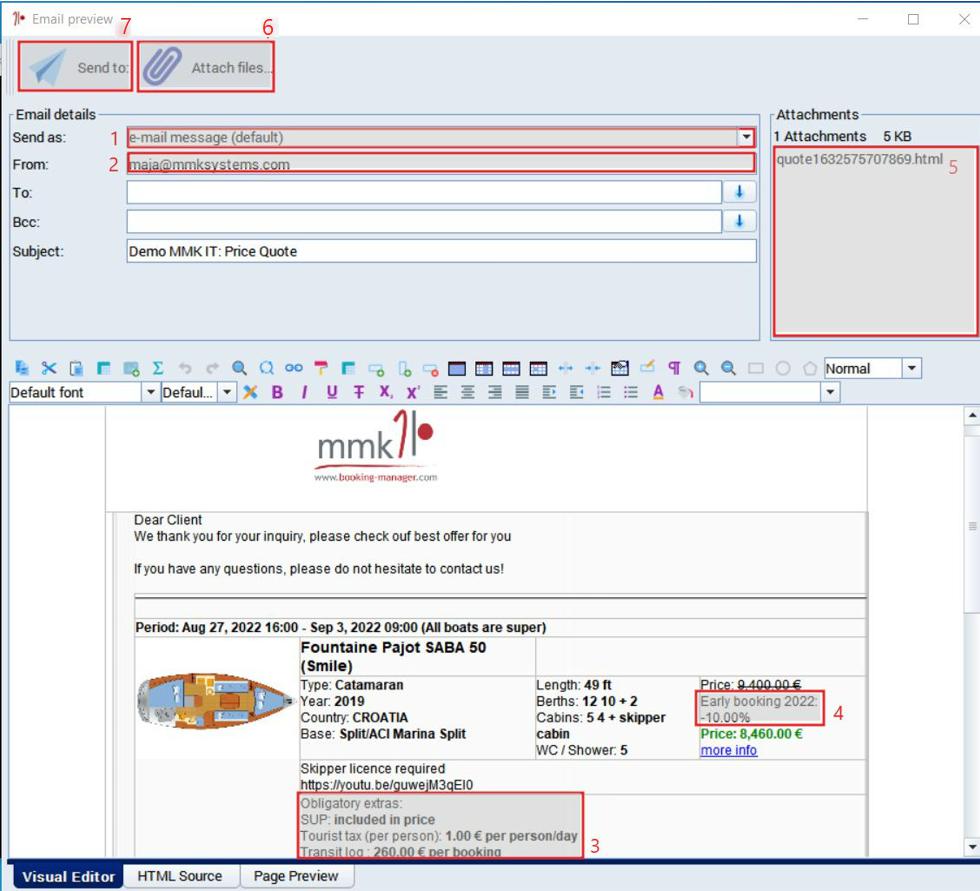
After you pressed Send Price Quote, a new window will open
- The E-mail field is already filled. It shows how the E-mail is being sent, as an e-mail message by default and will show whether it is sent through Outlook or as a direct message from the program. Alternatively, you can choose to send it like e.g. Mailchimp newsletter.
- The receiver of this mail is the selected client (in the To field)
- The quote will include the Obligatory and optional extras
- Selected Discounts will be visible by name.
- The quote itself is in the Attachment
- You can add additional attachments if required
NOTE: If you are including in your quote a boat that is under option at the time of the sending, this will be shown in the quote along with the number of days until the expiration of the option.
7. Press Send to proceed.
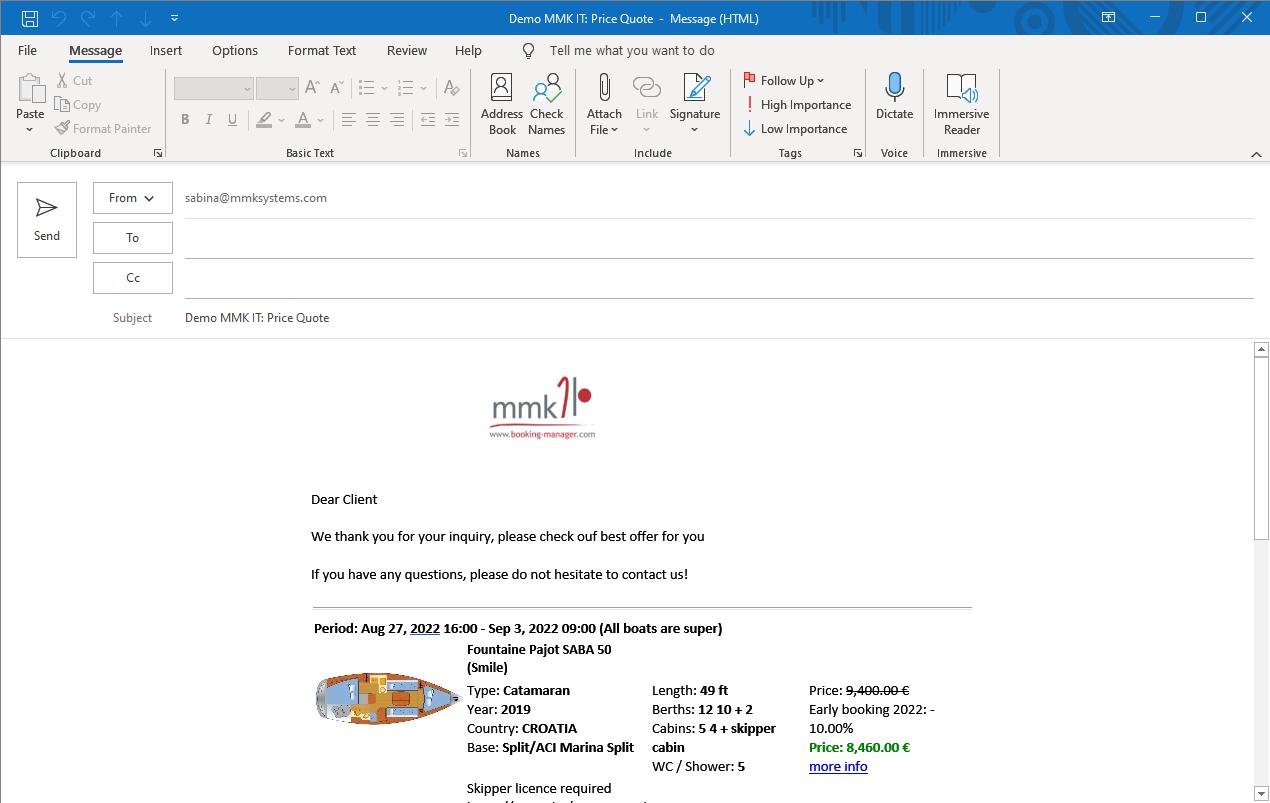
If you are sending a quote directly from the system pressing Send will complete sending.
If you are using Outlook, the Outlook window will open and you will have to complete sending from there.
Each message can be customized, check it under this link
Comments
0 comments
Please sign in to leave a comment.